
J
Jan Krishnamurthy
Guest
In this blog we demonstrate the In-Process Corticon .NET Object Messaging Technique using the Cargo Tutorial Example, a useful performance-enhancing tactic. This tutorial is designed for Corticon 5.5.2.
With large payloads, performance benefits are critical. The In-Process Object Message technique has performance benefits over XML messaging when large payloads are involved. The biggest performance hit in XML messaging is the overhead to convert the incoming XML into Corticon Data Objects (CDOs) before any Rules fire. An in-process object call is 50%-90% faster depending on the size of the XML documents and the complexity of the rules.
In this scenario, as a .NET developer your responsibility is to write .NET code to instantiate a Corticon .NET Server, deploy Ruleflows as Decision Services, send request messages to the Decision Services and receive response messages from the Decision Services. Let’s demonstrate how to use this technique and gain the performance improvements I spoke about above.
To use this technique you must follow the steps below:
Part 1
In the Import Java Class Metadata window:
If you'd like to try this for yourself, feel free to grab the code and necessary files I've presented above right here.
With that, you should be able to realize some significant performance gains while using Progress Corticon. Don’t forget to check out what’s new in Progress Corticon to learn more about the newest updates and features available in our latest release.
Continue reading...
With large payloads, performance benefits are critical. The In-Process Object Message technique has performance benefits over XML messaging when large payloads are involved. The biggest performance hit in XML messaging is the overhead to convert the incoming XML into Corticon Data Objects (CDOs) before any Rules fire. An in-process object call is 50%-90% faster depending on the size of the XML documents and the complexity of the rules.
In this scenario, as a .NET developer your responsibility is to write .NET code to instantiate a Corticon .NET Server, deploy Ruleflows as Decision Services, send request messages to the Decision Services and receive response messages from the Decision Services. Let’s demonstrate how to use this technique and gain the performance improvements I spoke about above.
To use this technique you must follow the steps below:
Part 1
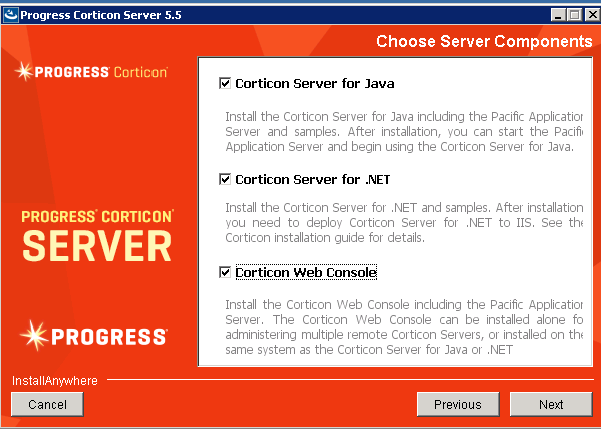
- Install Corticon Studio 5.5 and Corticon .NET Server, and then apply service pack 5.5.2 over the base install

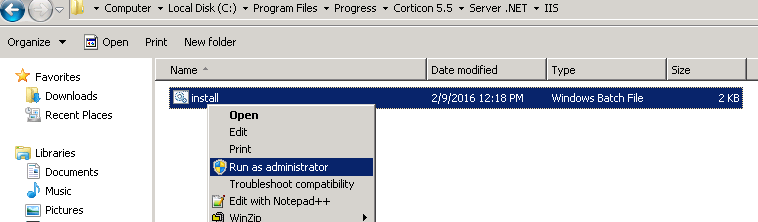
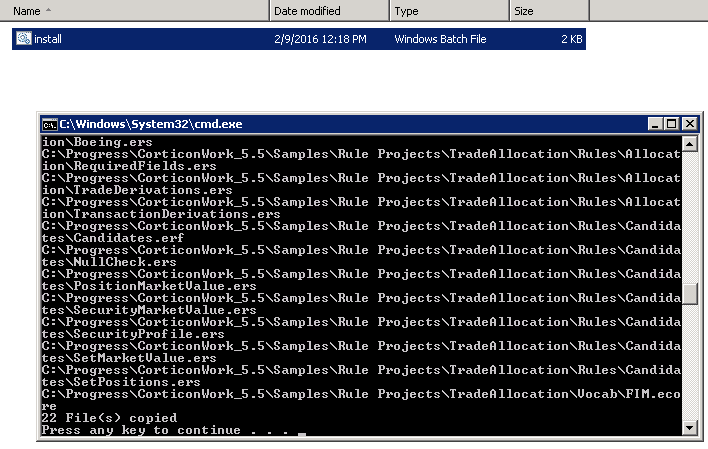
Run install.bat—this will copy all the Corticon .NET Server .dll and .jar files to C:/inetpub/wwwroot/axis.
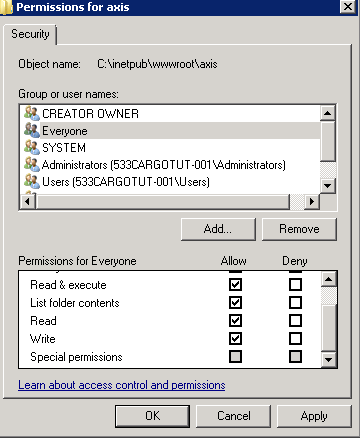
Replace the CcLicense.jar in C:/inetpub/wwwroot/axis/lib folder with your permanent CcLicense.jar. Make sure axis and all of its sub folders have “Everyone” permissions.
- Write a .NET Business Object class for Cargo entity, with getters and setters for each attribute
When you write the class, the class name and the entity name must match exactly. The letter-case (uppercase/lowercase) should also be the same. All the entity classes should be defined under the same namespace.
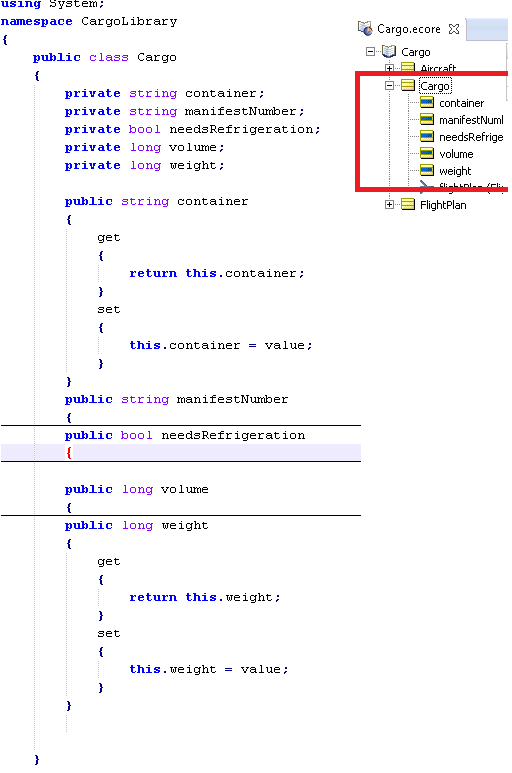
- Compile the CargoLibrary.cs class to a .dll named CargoLibrary.dll
To do this, open the Microsoft Visual Studio Command Prompt and run the following command:
csc /t:library /out:<OutputDLLFileName.dll> <EntityClassFileName>
For the Cargo example, the .dll file is named based on the namespace. The program file name that contains the entity classes is CargoLibrary.cs. So the following command is run:
csc /t:library /out:CargoLibrary.dll CargoLibrary.cs
- Generate Java stubs from the .dll
Go to: <Corticon_Server_Install_Dir>/Server.NET/samples/gen stubs
Copy the compiled CargoLibrary.dll file to this location.
Open GenStubs.bat batch file in an editor.
Modify the SET INPUT_DLL_NAME property and specify the CargoLibrary.dll file that you compiled in the previous step.
Modify the SET OUTPUT_JAR_NAME property and specify the name of the output .jar file, i.e. CargoLibrary.jar.
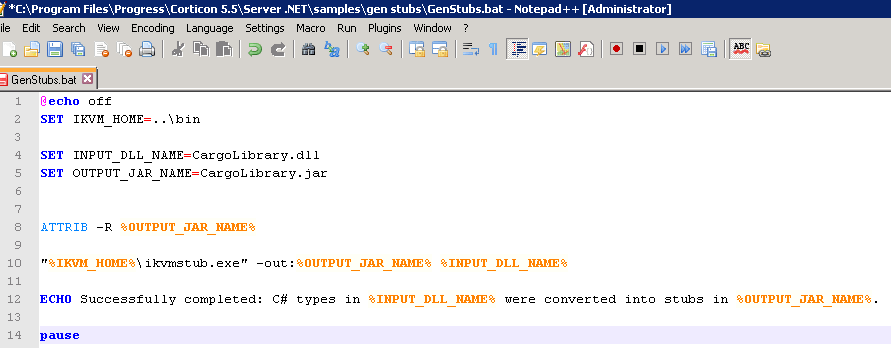
Save and close the .bat file
Run the GenStubs.bat file. (You can ignore the ‘File not found…’ message in console if it appears)

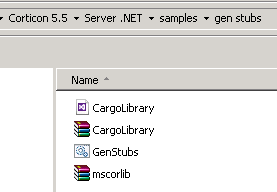
Ensure that the CorticonLibrary.jar file is created in: <Corticon_Server_Install_Dir>/Server.NET/samples/gen stubs
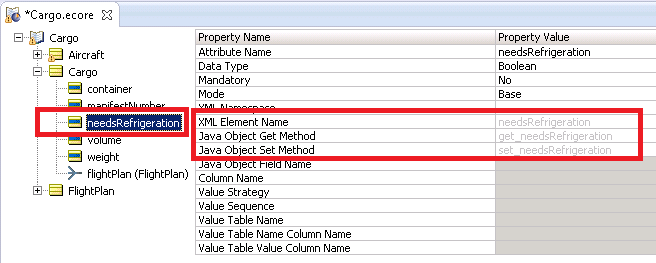
- Open Cargo Tutorial Example in Studio and Import Java class metadata into the Vocabulary in Studio
Open the Vocabulary.
Ensure Studio is in Integration and Deployment mode.
Select Vocabulary > Java Object Messaging > Import Java Class Metadata.
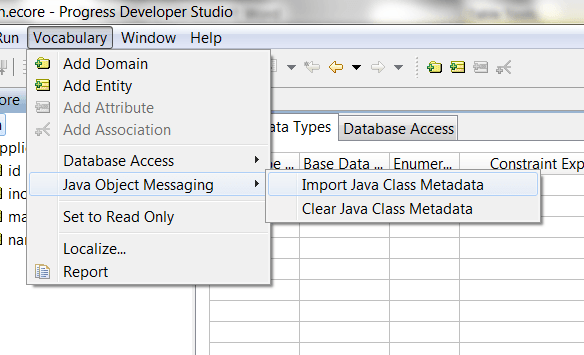
In the Import Java Class Metadata window:
- Specify the location of the .jar file in the From directory field
- Select the .jar file you generated earlier
- Select mscorlib.jar
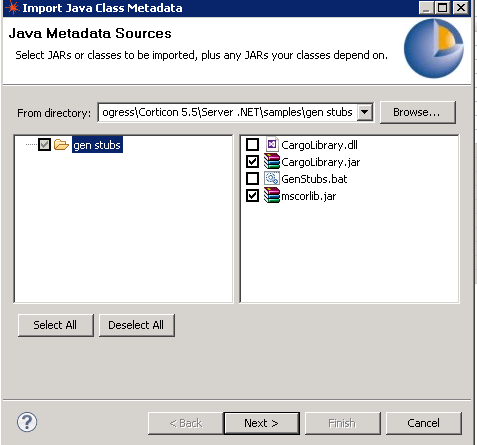
- Click Next
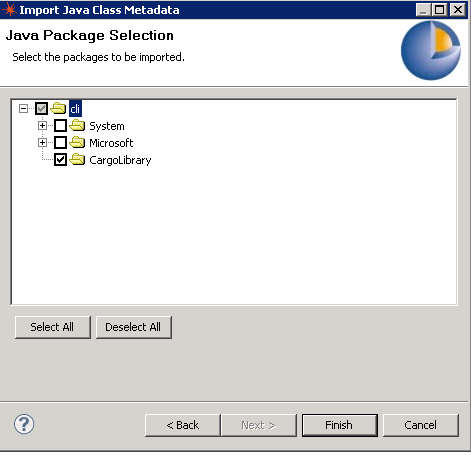
- In the Java Package Selection page, ensure that the namespace in which you defined the entity classes is selected and deselect other packages
- Click Finish
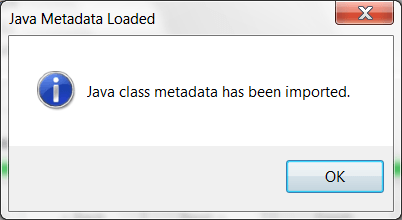
- Click OK in the dialog box that appears and states that the Java class metadata has been successfully imported
- Save the Vocabulary file
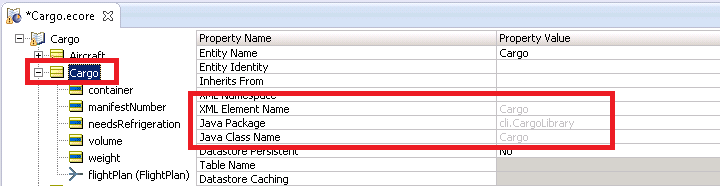
- You can verify that the Java classes have been imported and mapped in the Vocabulary by selecting an entity or attribute in the Vocabulary tree and verifying that the Java properties on the right are automatically populated
- Place the .dll and .jar in the appropriate location and Compile Ruleflow to .eds using Deployment Console
Copy the .jar file to: <Corticon_Server_Install_Dir>/Server.NET/samples/lib and C:/inetpub/wwwroot/axis/lib
Copy the .dll file to: <Corticon_Server_Install_Dir>/Server.NET/samples/bin and C:/inetpub/wwwroot/axis/bin
Launch DeployConsole.exe application from: <Corticon_Server_Install_Dir>/Server.NET/samples/bin
Pre-compile tutorial_example.erf into an .eds and save it in: C:/inetpub/wwwroot/axis/Rules
Save the .cdd file in: C:/inetpub/wwwroot/axis/cdd
- Use the compile assembly.bat file if you want to include the Assembly.dll within the .eds
(This is an optional step and helps reduce the time taken to load the .eds file into memory. This is useful, if you are dealing with large ruleflows and need to deploy multiple decision services)
Go to: <Corticon_Server_Install_Dir>\Server .NET\samples\compile assembly folder
Copy .eds file from: C:/inetpub/wwwroot/axis/Rules to this location
Copy CargoLibrary.jar from: C:/inetpub/wwwroot/axis/lib to this location
Edit CompileAssembly.bat batch file in an editor.
SET INPUT_EDS_FILE_NAME="..\compile assembly\Cargo_v0_16.eds"
SET REFERENCE_JAR_FILE_NAME="..\compile assembly\CargoLibrary.jar"
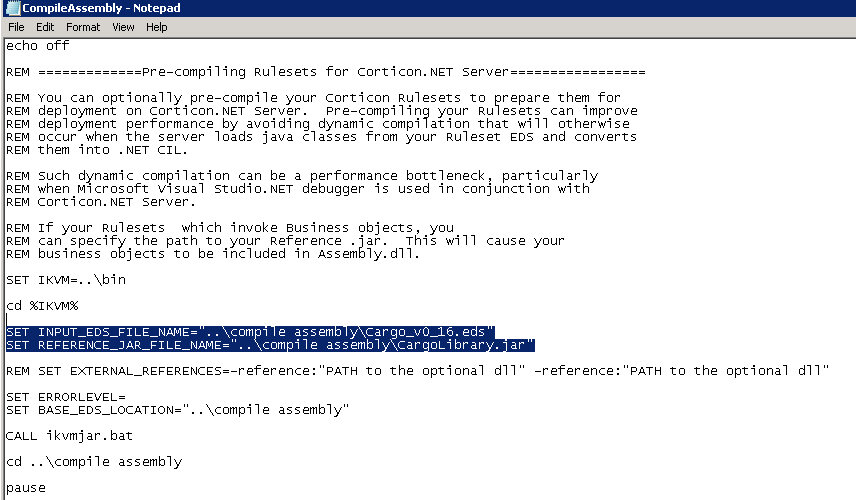
Save and close the batch file.
Run CompileAssembly.bat.
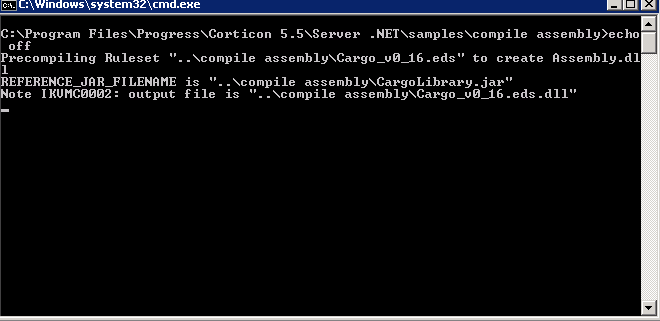
The .eds file in <Corticon_Server_Install_Dir>\Server .NET\samples\compile assembly folder is an updated .eds file that contains the Assembly.dll.
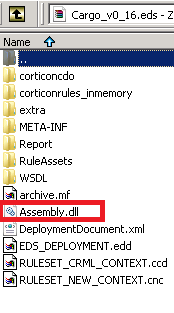
You may use this .eds file with Assembly.dll in C:/inetpub/wwwroot/axis/Rules.
- Write .NET code to instantiate Corticon Server, deploy the Ruleflow to it, send request (in the form of objects to Corticon server that hosts the decision service) and receive response (in the form of objects)
The code in the screenshot below was written in Visual Studio Express 2012:
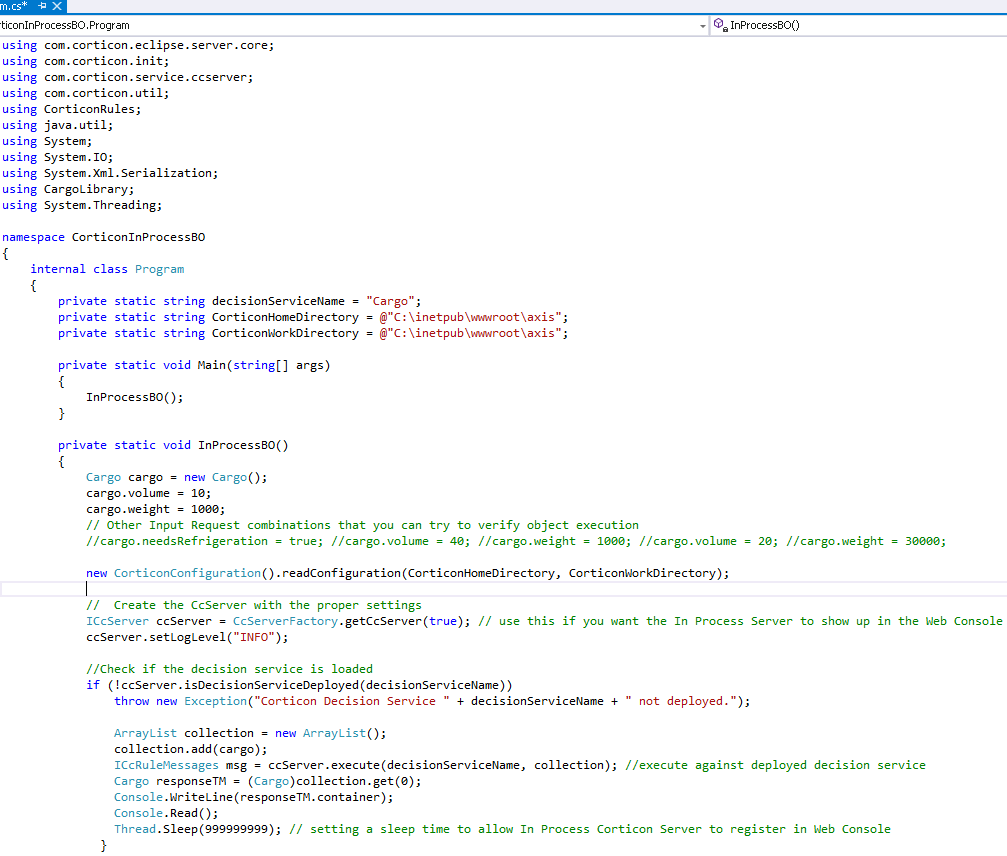
Based on the rules, for an input volume of 10 and weight of 1000, the response should post container=standard
You can try various other input combinations to test the rules and obtain the respective responses.
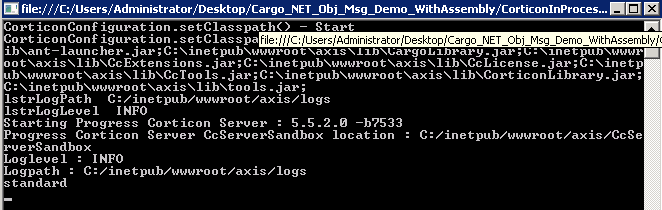
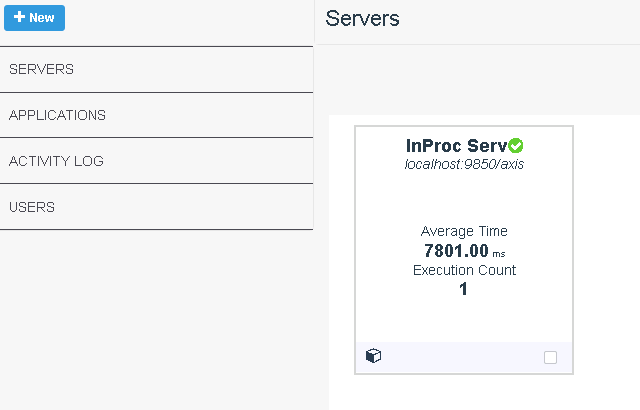
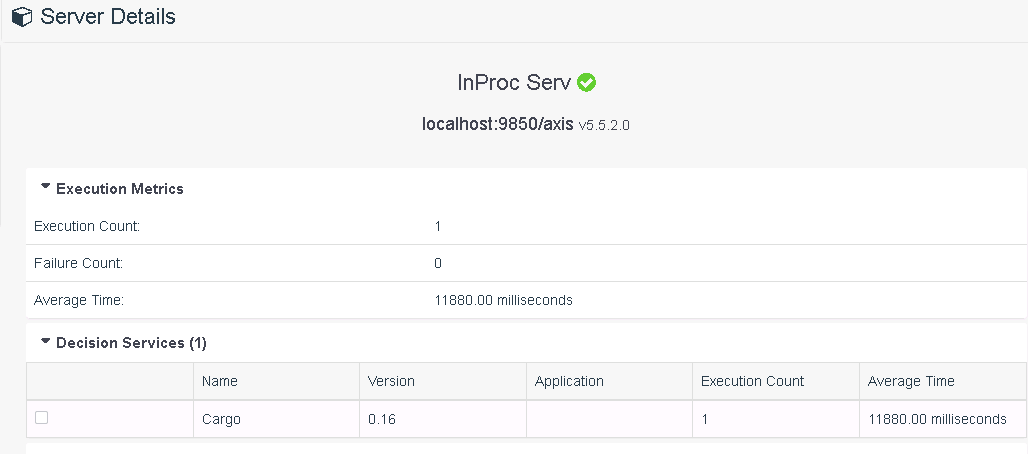
- You can also monitor and manage the in-process server in Corticon Web Console 5.5.2
Ensure the following properties are enabled in C:/inetpub/wwwroot/axis/conf /CcServer.properties
com.corticon.server.embed.managementPort—The embedded tomcat listing port. Defaults to 9850.
com.corticon.server.embed.managementWebLogDirectory=%CORTICON_WORK_DIR%/logs
com.corticon.server.embed.managementWebLoglevel=FINE
Start the web console from C:\Program Files\Progress\Corticon 5.5\Server\bin\startServer.bat
On a browser, go to http://localhost:8850/corticon. Log in as admin/admin.
Add a Server to register the InProcess Server on port 9850 and monitor it.
If you'd like to try this for yourself, feel free to grab the code and necessary files I've presented above right here.
With that, you should be able to realize some significant performance gains while using Progress Corticon. Don’t forget to check out what’s new in Progress Corticon to learn more about the newest updates and features available in our latest release.
Continue reading...